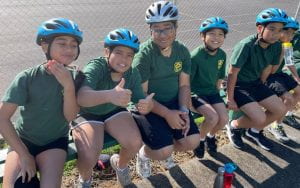
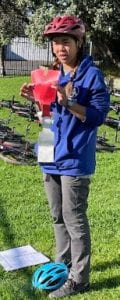
During Thursday, we had cycling today because it’s in the school curriculum. Our coaches were both girls whose names are Stephanie and Lucy. Most of us were usually excited and couldn’t wait because we were lucky to have another lesson for cycling this year. She first showed us these tickets with the words; ‘reckless driving’, and it made me think about speeding tickets. Stephanie said that they’re temporary and can help you to get better. Stephanie is on the left and Lucy is on the right.
After the reckless driving tickets, Stephanie showed us a red ticket, again, made me think into the past where I watched football matches with people getting a red ticket. She said that it’s similar to what happens when a player gets a red card but when it’s put into driving. She said that hopefully we wouldn’t get any of the red tags and even the reckless driving cards. Luckily, we didn’t get any cards but some of us still crashed which was pretty funny.

After showing those cards, Lucy showed us a helmet and said to check the 4 s’s on the helmet; Shell, Styrofoam, Straps and stickers. To check the shell, check if there are any large dents or cracks. The scratches are fine. For the styrofoam now, squeeze the helmet with the shell facing you, and if it moves, you have to change it. If it also has large dents or cracks you have to also change it. Next, straps. There shouldn’t be any rips in the straps but you should change it. The last and final one, stickers. Check the sticker if it has a bicycle picture on it or if it has the word, bicycle on it.
We all checked our helmets and got more instructions to wear it; first wear your helmet and feel the screw that should be behind your head. Turn the screw to the loud side or the right side. Use your pointer/index finger and your middle finger, then, put those 2 fingers on your forehead. If the helmet is past the 2 fingers, turn the screw to the left side. If it’s too close to your hair, turn the screw more to the right side. Next, clip your straps together and make them more tighter with the 2 straps on the side. Use your 2 fingers again under your neck and make the straps touch your fingers.
After doing those steps, shake your head facing your feet and get your 2 arms to catch the helmet. The helmet should stay on your head a little tight.
Stephanie got 2 people to say vegetables which were carrots and broccoli. I was in carrots. One went with Lucy and the other went with Stephanie. Next, Lucy showed us how to check our bikes, which is ABCDDQ. The first one, A, is air. Check the wheels if it’s firm like a hard potato not a soft potato. Second, B, is brakes. Use your 2 fingers like last time on your brakes and press them. Push the front and back wheel, They should have had the back and front wheel go up.
Third, chains. The chain in the back wheel should look like the colour grey and black. There can be bits of rust but not big clumps of rust or you will have to change it. The 1st D, direction. Use your legs and press them together with the front wheel in the middle of your legs. The control bar for the bike shouldn’t really move.
The 2nd D, Drop. Drop the bike only a little close to the ground and listen close for any funky and weird noises. The last one Q, quick release.There should be 3 quick releases on the front, back and seat. To check it, press down the quick release and pull it gently. You can also adjust the seat by opening the quick release and putting it back on the seat height you want.
My group and I got our bikes and went to the bottom court and followed her instructions once again to check our bikes, then we played green light red light in a circle. Then, Lucy showed us how to use gears. Gear 1, the biggest gear, is the easiest gear. Gear 8, the smallest is the hardest gear. You can use gear 1 for mountains and Gear 8 for sand and concrete.


